Showing posts with label D-Lish Scraps. Show all posts

Friday, 30 June 2017

Kraft Plus June Challenge

Wow, two months since my last post. Life certainly has been cramping my crafting time and style lately! But back to share a last minute page for the June Kraft Plus challenge, which was to use Kraft plus one other colour (black and white ok). I chose to use yellow, one of my favourite colours at the moment, bright and happy!


And some close ups...


Lots of D-lish Scraps goodies and of course a Charms Creations, and my new favourite "toy" distress oxide ink on my background. Must say, I held off on the distress oxide inks, but now I am addicted and have just put in an order for the 12 new colours!

Thanks for stopping by,

Katie x

Tuesday, 7 February 2017

Scrapbooking Top 50 February Challenge

So here we are in February, a super busy month for our family. Hopefully not so busy for you so that you have time to complete the Scrapbooking Top 50 challenge this month. This month is a great sketch:


Charms Creations is a sponsor this month too, so a good opportunity to maybe win yourself some goodies to play with!

Here is my page:


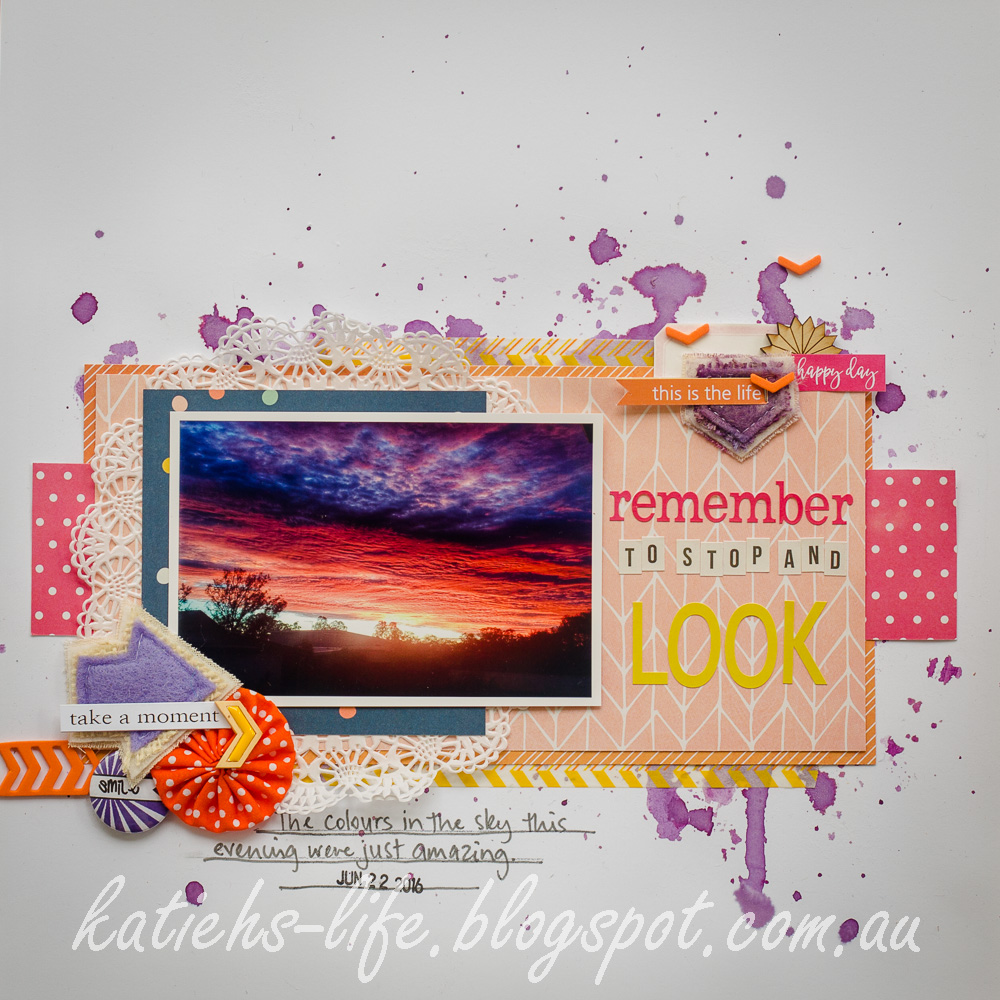
When I picked out this photo, I just knew that I had to add some touches of purple to my page. I used some of the Colour Blast shimmer dust in velvet to create my water colour background and I also used it to colour my terrific tab from Charms Creations. The great thing about DIY or white Charms is you can make them whatever colour you need them to be, a great staple in any collection!


I also had a purple arrow that I had to use and I layered it with a flair from D-lish Scraps and some bits from Burdy's Embellies.


Here is the coloured tab along with a wood veneer from Rainbow Splendour and the insides of the arrow in the bottom cluster.

So, now you have seen my take on the sketch, it is time for you to have a go too!

Thanks for stopping by,

Katie x

Wednesday, 11 January 2017

Show Us Your Stuff January

Good Morning! Popping in today to share a page that I created for the current Show Us Your Stuff challenge. This month is a great bright summery inspiration board, and it was the colours that grabbed my attention and what shaped my page. Here is the board:


And here is my take on the board:


I loved the rainbow coloured boards in the picture and used that as my starting point creating a colourful fringed background. I also documented a summer story about how summer means cricket in our house (well for me at least!).


I have used a Charms Creations tab in this little cluster. These tabs are great for little clusters!


This cluster has some Rainbow Splendour goodies, a pretty pin, and epoxy and a wood veneer. The title is also hand made, by me! I created a script title that I fussy cut out to be part of my title.


And the final cluster with another Charms Creations, this time an arrow, a D-lish Scraps flair and more wood veneer from Rainbow Splendour. There is also a vellum card from RS peeking out from behind my photo and the hint of a D-lish Scraps journal spot. So much hand made goodness on one page! Can you tell where I get most of my embellies from?!

Thanks for stopping by,

Katie x

Thursday, 25 August 2016

D-lish Scraps Birthday Celebrations

D-lish Scraps celebrate their 7th birthday last weekend coinciding with their monthly cyber crop and some extra fun challenges. One of these was a blind scrap, now I didn't get to do this in real time (assignment work to be done!) but I did sit down later when I had some time to spare and had a go. Well it was one of the fastest pages that I have ever completed! So now I am sharing my page here:


Of course I added some of my favourite D-lish goodies (can you spy the journal spots, beautiful doily, puffy stickers, enamel stickers and wood veneer title?!). To this I have added some of my other favourite goodies, Charms Creations and Rainbow Splendour.


I just love this little emoticon wood veneer from Rainbow Splendour. And this teal chevron from Charms Creations, well it's teal so it is fabulous!


I took my wood veneer title and rubbed some gelato over it to give it colour. It is a great way to add a nice smooth colour to wood veneer.


And this wood veneer is from Rainbow Splendour, also coloured with gelatos. Did you spy the touches of foil around the page too?!

Just a quick share today.

Thanks for dropping by,

Katie x


Saturday, 20 August 2016

Rainbow Splendour Fun

Good Morning!

I am popping today to share a page that I created playing with my pretty new Rainbow Splendour goodies! There was recently a new release and there are still a few goodies over on the blog if you haven't checked it out yet!

One of the things that I was pretty pleased with (even if I do say so myself!) was some cut files that I designed to go with each of the kits. Here is a sneak photo of the cut files for the girly kit:


I decided to take the open flower shape and create a background with it and use this as the basis for my page. And this is what I finished with...


I have been admiring for ages the fabulous pages others had been making by backing cut outs with patterned paper and I really wanted to give it a go, and this is how it turned out. I learned too that there are easy and hard ways for tracing shapes to cut out to back each flower! I used quite a few bits and pieces from the kit to help finish off my page too. Can you spot them?


I love the new wood veneer flowers, I foiled mine with gold to give them some shine. To do this I used my decco foil glue pen and some Heidi Swapp gold foil. Just cover the wood veneer with the glue and burnish the foil once it has dried (no need for heating with a laminator or minc!!!). Sometimes the glue gets sucked into the wood, so you may need to do this a few times, and even then it may not be perfect, but is still finishes up looking pretty cool.


The larger wood veneer with gold foil, you can see that not all of it is covered, but it still looks fine!


And here I have my little embellishment cluster with some other favourites. A Charms Creations heart, a pretty vellum bow, some glitter leaves and a D-lish Scraps journal spot. the little heart on top is from one of the cloud wood veneers (also from Rainbow Splendour) and it is foiled too.

So a relatively simple layout, but with lots of details. Loving how it turned out!

Thanks for stopping by,

Katie x

Tuesday, 19 July 2016

Guest Designer at 1,2,3 Challenge

I am a guest designer over at the 1,2,3 Challenge blog this month! They have a great challenge if you need some inspiration to kick start your creativity. This month the prompts are:


I even managed to make a pretty pastel boy page! Here is what I created with the prompts:


I used lots of pretty Cocoa Vanilla papers and a few die cuts too. Throw in a D-lish Scraps flair and a Charms Creations pretty pastel heart and the page just about did itself! For the glitter aspect I added two versions, firstly with a little tiny heart stencil and some glitter texture paste on the background and then using silver glitter washi and hand cutting some cute little hearts.


I am loving these pretty doilies from D-lish Scraps too, they are so delicate!


A bit pf peachy pink thread helps add a bit of texture behind the cluster.


And really, the flair says it all! These photos of my boy make me laugh!

Thanks for stopping by and check out the 1,2,3 Challenge blog to see more great pages with these prompts.

Katie x


Thursday, 21 April 2016

Charms Creations Scraplift Challenge

Good Morning, Charms Creations challenge this month has been to scraplift one of the creative team, and you can do as many as you like! All of the creative team have been enjoying scraplifting each other and today I am going to share a page inspired by one of our guest designers.

This gorgeous page was created by Chloe Nielsen:


And this is the page that I created based on Chloe's:


I loved the whimsical nature of the layout and paper layering and the great clusters with die-cuts, and who can go wrong with a Charms Creations super star?!


I even managed to add a Rainbow Splendour pretty pin to my page!


I love how this is only a single die cut, but it looks like I have added the black and white washi, and I just had to add some touches of gold too!


The natural tones of the kraft worked so well with the colours in this page, and this kraft ticket journal spot from D-lish Scraps was the perfect choice!

There is still time to join in on this fun challenge! Make sure you pop over to the facebook group and check it all out.

Katie x


Tuesday, 19 April 2016

Scrap the Girls April Share

Good Morning! Today I am back to share my take on the April Scrap the Girls challenge. This month we have a beautifully girly mood board created by our very own Rikki.


The colours are just divine. I worked with all of the colours and a photo of me and my newest niece and finished with this page:


 I focused mainly on the peachy-pink and grey and added splashes of aqua and purple and also gold as seen in the quote (any excuse to add gold I say!).


For this little cluster I have a gorgeous vellum bow from Rainbow Splendour, a heavenly heart from Charms Creations, a flair from D-lish Scraps and a little resin dot from Resin Rainbow.


Lots of gorgeous flowers from D-lish Scraps here along with my go-to journal spots, and don't you just love the gold vellum word, this was from a Maggie Holmes ephemera pack.

You still have time to get this challenge done, I hope to see your entries!

Thanks for stopping by,

Katie x

Monday, 18 April 2016

Kraft + April Share

Well I have to admit to another month disappearing in a flurry of activity here, how about you?! This year really feels like my catch phrase will be "so much to do, so little time".....

Anyway, I do try and give myself some creating time here and there, and I am sharing my take on the current Kraft+ challenge, which is Black and White and Kraft and a funky mood board, a pretty great combination I must say.


There is lots of great inspiration on the board too. I was drawn to the framed quotes particularly the different fonts, the dotty gift and also the circles of the plates. This is what I finished with:


I thought that this photo of the Brisbane wheel at night was a great choice given that it almost looks like a black&white photo, and for the circular element too. I have also been trying to use more stamping on my pages so created some patterned paper effects with word stamps using white and black ink. The white stamping is on a separate piece of kraft cardstock while the black stamping is directly on the background card. After this I just started adding suitable bits from my stash!


I love these wood veneer crosses from Rainbow Splendour and have coloured them with black ink to suit the page. Here this one is layered with half a vellum bow also from Rainbow Splendour, a Charms Creations chevron, ticket from Flutterby Designs and a couple of other little bits. The journal spot is from D-lish Scraps and they are my favourite to use!


In this little cluster is the other half of the vellum bow, another Charms Creations and another cross, but I love the big glitter ampersand and flair. The flair is from D-lish, and the die cut from a Heidi Swapp pack.


Finally, more little bits, the bingo card came from one of Rainbow Splendours kits from last release, a great thing for layering, and the little spotty bag was a D-lish Scraps goody.


There is still time for you to get your black and white on and create a page for Kraft +, I hope you have a go!

Thanks for stopping by,

Katie x


Thursday, 14 April 2016

Scraplift Challenge at Charms Creations

So, over at Charms Creations we have set the challenge to scraplift one of the creative team's pages, and you can do as many as you like. I have now scraplifted all of my team mates! It becomes quite addictive!

Today I am going to share my take on one of our very own Charmane's creations. Now I have to say, that I think was the hardest one out of them all to do. Mainly because it took me a lot of effort to make it look effortless, if you know what I mean!! Anyway, I think it turned out alright!

First of all here is Charm's original:


And, yes, as Charm herself said, I did go an pick one of her "busier" pages! Nothing like making things complicated for yourself....

And my version:


As you can see, I went with a nice bright hot pink instead of the soft blue, and a little touch of yellow for some fun.


Love these lollipops, so fun with the little camera buttons!


Terrific tabs and heavenly hearts, staples in my supplies!


All of the Charms that I have used and the twine, doily and some of the wood veneer came from one of the fabulous kits that Charm brings out every now and then, so it was really quite easy to put that side of the page together. But you can find some similar versions in the shop here.

You still have time to have a go at this challenge too, and I warn you, once you start it is hard to stop!

Thanks for stopping by,

Katie x

Saturday, 26 March 2016

Charms Creations Share

I don't know about you, but I love Charm's mixed packs that she puts out in a sale every now and then, and the most recent sale was full of lots of gorgeous packs. Alas I didn't get to any of these in time, but I was not too worried as I still had some left over from other sales!

So I decided to try and put one of these packs to good use and show you how you can get just about all your embellishing needs for a page done with one of these and still have a few bits left over! I picked a gorgeous blue themed pack that worked well with one stand out colour in the photo that I had chosen, then it all came together pretty quickly.


So, from the pack are: heavenly heart, super star, paper doily, project life cards, twine, small crocheted doilies, wood veneer heart and coloured bulldog clip. The only extras added were the splash of pink enamel hearts from D-lish Scraps, the vellum bow from Rainbow Splendour, Flair from Flutterby Designs, word stickers from Crate Paper and the wood veneer title which was from Freckled Fawn. Too easy!


I love layering with Charms, it is especially easy with wood veneer and stickers.


The clip was a great way to add the bow too, layered with a few other bits to make another little cluster.


And I couldn't go past adding some metallic flair (in the perfect colour of course!) to this little cluster. I love the twine on the heart too.

So there you go, a page almost completely done with one kit.

Thanks for stopping by,

Katie x